Footage can greatly improve the look and pace of a video, but you don’t always have the rights or access to it, so you might instead decide to use photos and images.
However, just because these are still images doesn’t mean that you can’t animate, manipulate, or adjust them to make them more exciting and engaging.
In this blog, I will explain the different methods of taking a still image and turning it into an animated video, from a simple scale to a complex parallax.
I will be using Adobe Photoshop and After Effects to change this still image into a moving animation:
The easiest method to add a little bit of movement is to keyframe the scale and/or position so that it moves gradually towards/away from the camera or from side-to-side/up or down.
Video editing software will allow you to do this by marking a keyframe at 0 seconds and then adjusting the image further along the timeline to create a new key frame. 
This means your image will scale, making it more eye catching and interesting to the viewer.

However, you can take this a step further and manipulate the image to make it appear 3D by moving realistically. In reality if a camera zoomed in, the depth would become apparent, with the background moving slower than the foreground components.
When done in animation using a flat image this is called parallaxing, cutting the 2D image up into the separate parts and placing it within 3D Z-Depth. As the camera zooms in, the different aspects will move independently of each other in regards to their distance from the camera, creating a realistic illusion of depth. 2D animation exists within the X and Y axis; X being left and right, and Y being up and down. But 3D adds another dimensions by adding the Z axis - this is the depth. So if the 2D photo is manipulated within all three axes, then it becomes 3D and appears to move more like actual footage.
So, how is this done?
The first step is to separate the image into different layers using Photoshop. 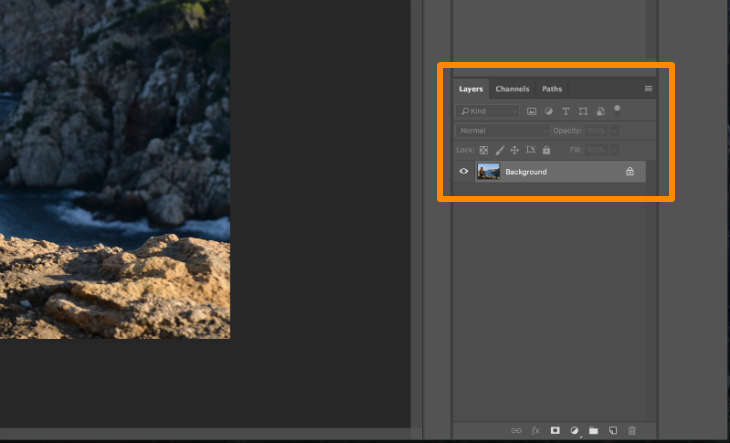
As you can see (on the layers tab on the lower right hand side) it is currently only one layer. I will be separating it into the following:
- The Girl and the wall.
- The greenery just in front of her.
- The cliff in the middleground.
- The cliff in the background.
- The water x 2.
- The sky.
The water may present some issues as it covers a lot of depth so cannot remain as one layer. The water nearer the camera will need to move at a similar speed to the first cliff, whilst further back it will move like the second.
Using the pen tool in photoshop, I begin by cutting out the girl. The pen tool is very adaptable, as you can use bezier curve to curve the line or hold down alt to just curve the line to the next point, allowing you to follow the image perfectly. 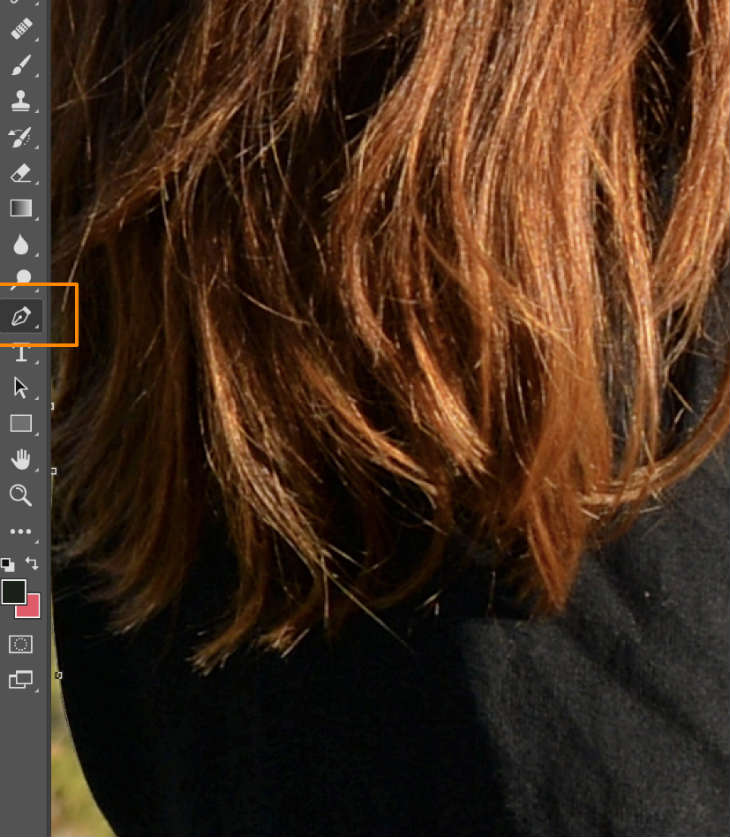
The girls hair presented a small issue, but remember that the image will be moving, and we can work on this when we come to it. 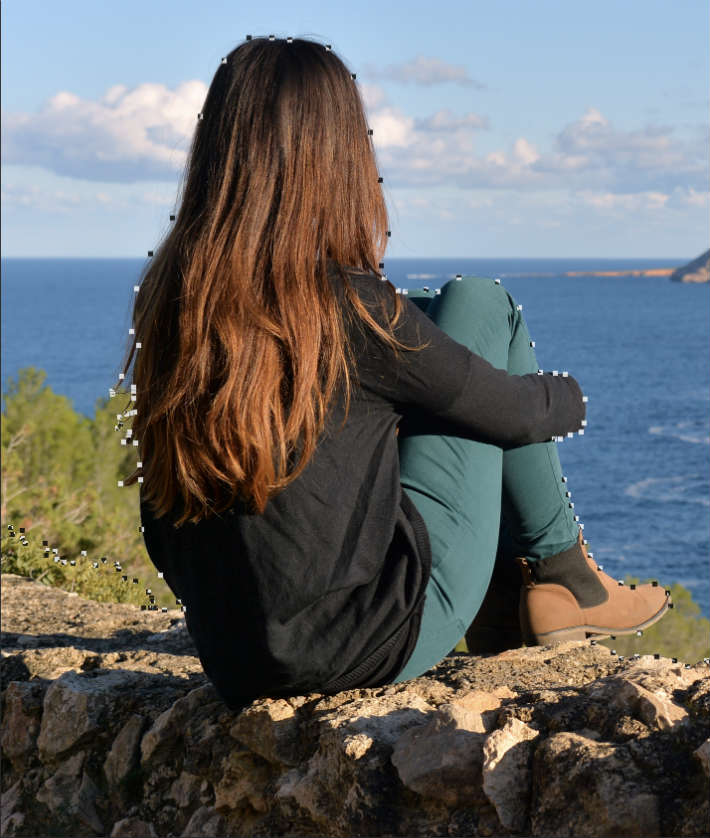
Once I finish using the pen tool around the girl and the wall, I select the path and create the new layer.
The girl and the wall is now cut out:
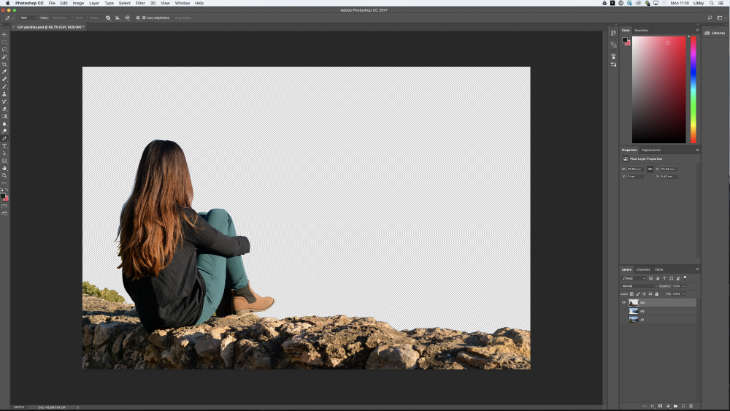
Leaving the rest of the image like so: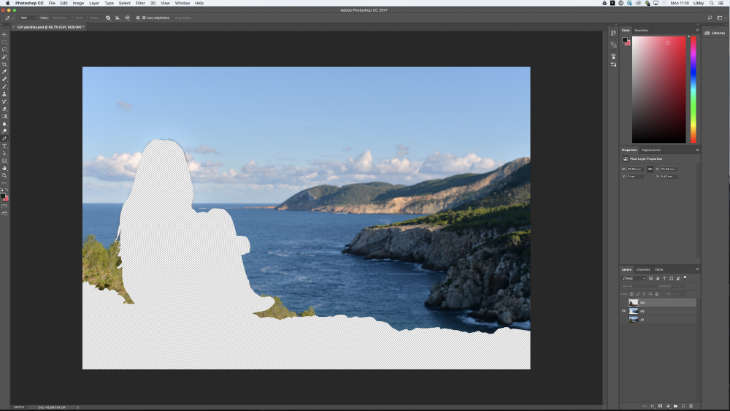
Now I will cut out the other layers and then we have to fill the gaps that have been created.
We are now left with multiple layers that all need to be worked on to remove the transparency gaps so that you can move the different layers freely, without having to worry about revealing gaps in the image.
For example, the sea will have to spread over the whole image, so I will use that layer to show you some tricks for filling the gaps.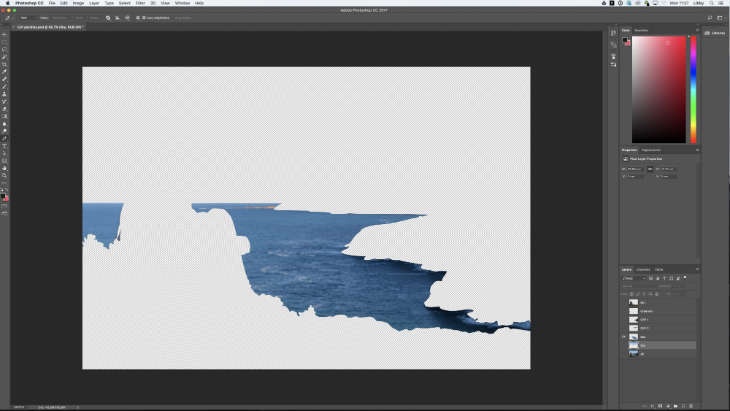
There are some very useful tools which can be used to rebuild layers and fill in the transparency gaps.
These include:
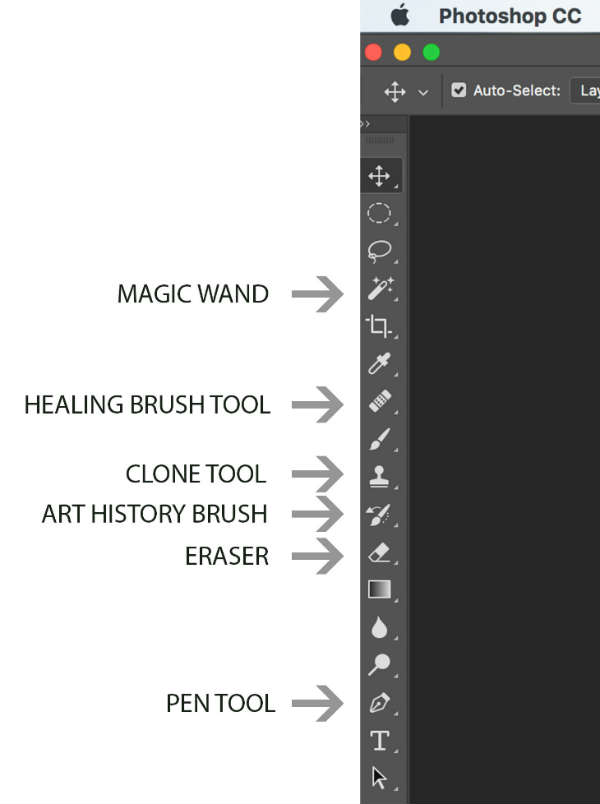
I have highlighted what I consider are the most useful tools in the the Photoshop toolbar for this task:
- The Magic Wand is good for quick selection. For more precise selection and a smoother line use the pen tool. Inverting your selection with cmd+i can be very handy.
- The Healing Brush tool is extremely useful for copying other parts of the image onto transparent gaps or blending.
- The Clone tool does a similar thing to the Healing Brush, and you can decide the opacity of the brush to get a really nice blend where you previously had a harsh edge.
- The Art History brush lets you regain deleted parts of the image.
- The Eraser is especially useful if you reduce its opacity or flow, and use it to soften one layer over another.
To fill the whole sea you firstly use the clone tool to complete its outline: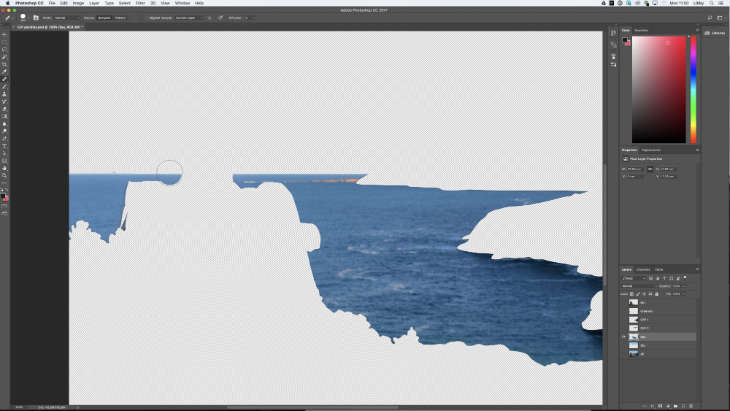
Then select what you want to fill with the magic wand, and use Select>Modify>Expand (found on the top menu bar) to increase selection by a few pixels (this is not essential but stops any pixels being missed so you do not have to blend edges yourself).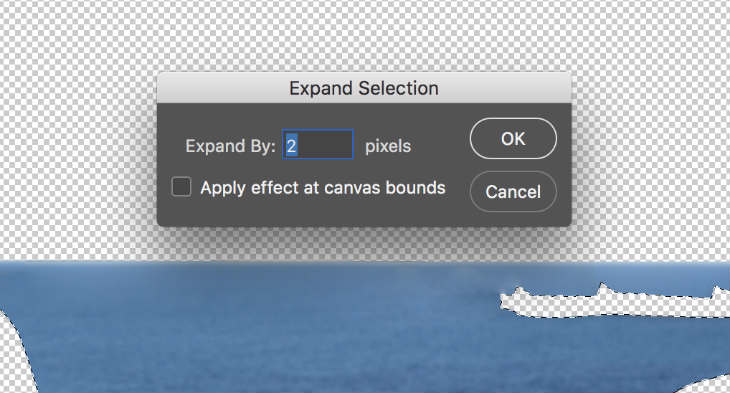
We’ll now use what I consider one of Photoshop's most intuitive tools: Edit>Fill>Content Aware (found in the menu bar, or SHIFT+F5).
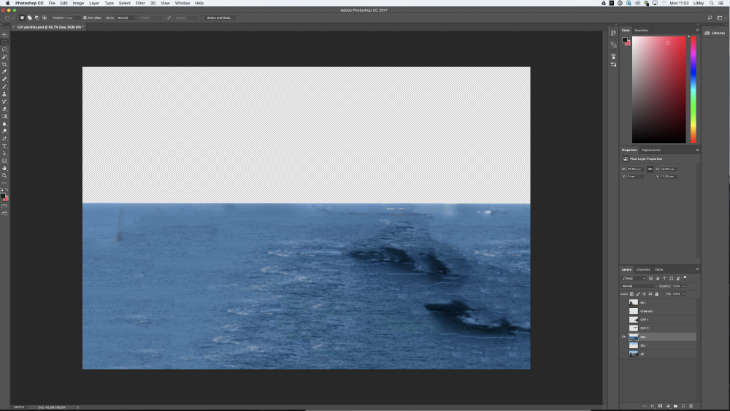
This tool replicates the information found in the layer to fill the transparent parts. It is great, even when replicating a crowd of people for example, though some cleaning up is generally needed via the Healing Brush tool or Clone tool.
When it comes to parallaxing, be aware that your image will be moving, and as we will be using a camera, there will be depth of field on the image meaning that various parts will be blurred. Therefore you do not have to spend too much time making distant layers perfect as the camera will probably do this for you, or in the case of the greenery behind the girl, it will be covered by her. 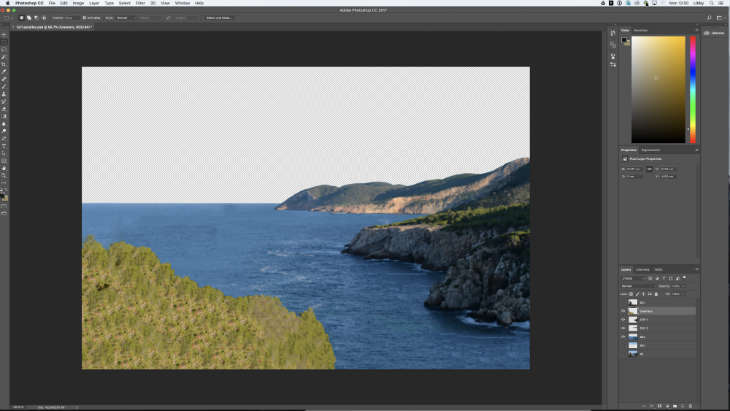
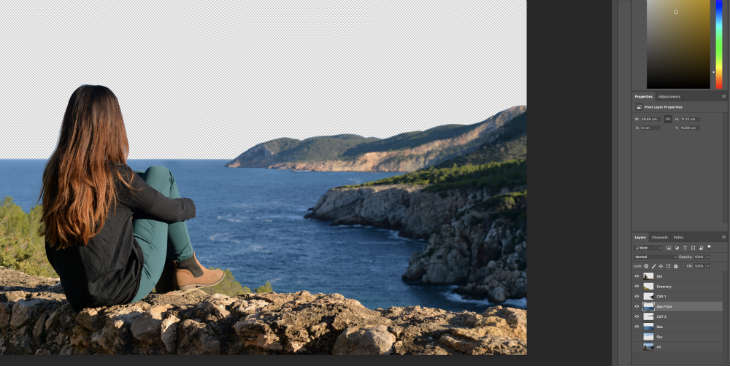
I am discarding the sky as I am going to replace it with a new complete photograph or sky footage. These can be acquired from stock websites or your own images.
So, with your layers all cut up and filled, you can move them into After Effects.
Start a new project in After Effects, import your Photoshop file (Composition>Retain Layer size) and open that composition.
I keep a reference layer of the whole image to help keep the layers in a similar position in their X and Y axes, despite moving them in the Z axis.
This is what you have to do:
- Turn all your layers (apart from the reference) into 3D layers.
- Add a camera to your scene (all the lenses create different depth, and it’s good to decide what depth you want at this point. If you change the camera lens later you will have to move all your layers into place again as the layer greatly affects them. Have a play around to see what kind of effect you like, but for this I will be using a 35mm.).
- Move your layers in Z depth according to how far you want them to be from the camera (I parented each cliff to their associated sea layer so that I could just scale one and the other would follow).
- Scale them (looking at your reference image) so they are back to their right size as moving them back in Z depth will have made them smaller.
- Move your camera and see the basics of your parallax!
I have done a screen recording of this:

Then, by placing a keyframe at 0 frames of the camera position and going to the end of your timeline, moving the camera, and placing a new key frame, the camera will move when you press play (space bar is the quick key to play through your After Effects timeline).
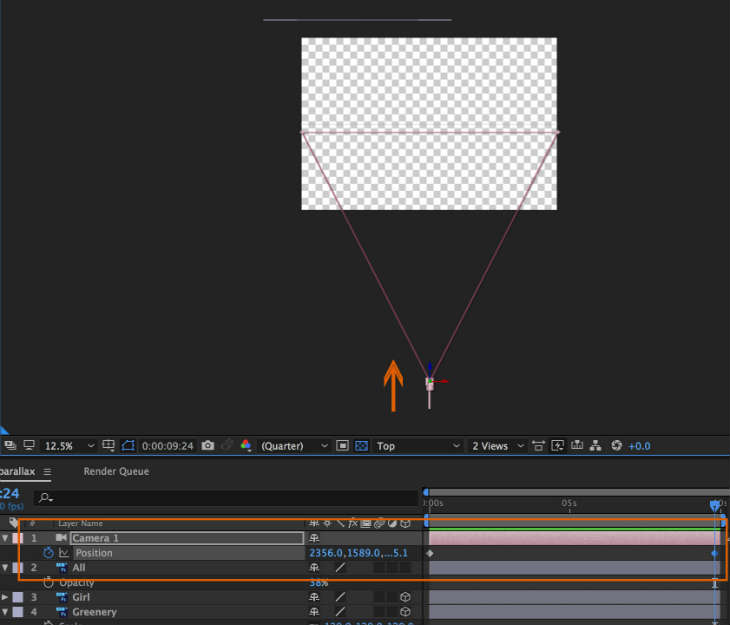
Now, lets add the sky.
I downloaded an image from cgtextures.com, and added it to my composition, pushing it back much further than my furthest cliff. Keyframe its position at the start and the end, and the clouds will move from side-to-side creating the illusion of a moving sky like so:

But there is a lot that could improved. Firstly, all the edges are too sharp, and secondly there is no depth of field on the camera.
The effect ‘Roughen Edges’ is a very quick easy trick to feather the edges.
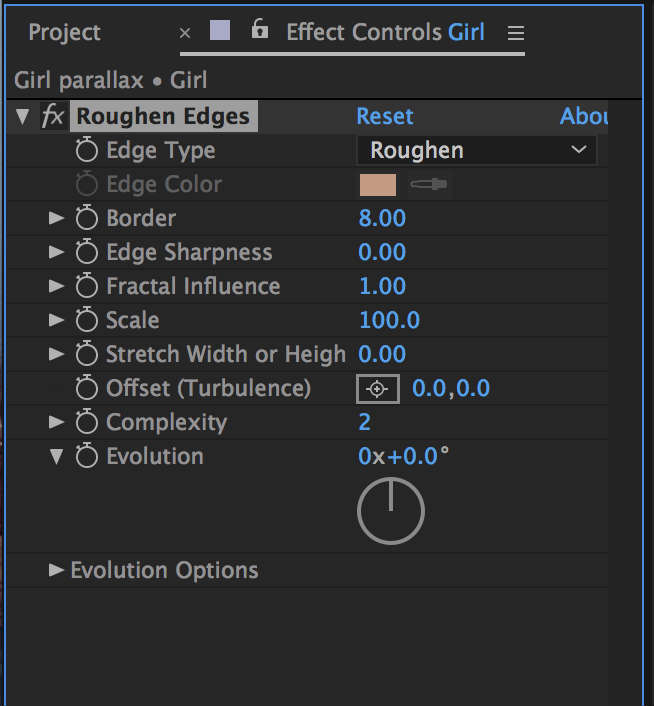
Decrease the Edge Sharpness to 0 and your edges will immediately soften, adding realism to the scene.
Then, let’s add the depth of field.
Open your camera layer and turn on Depth of Field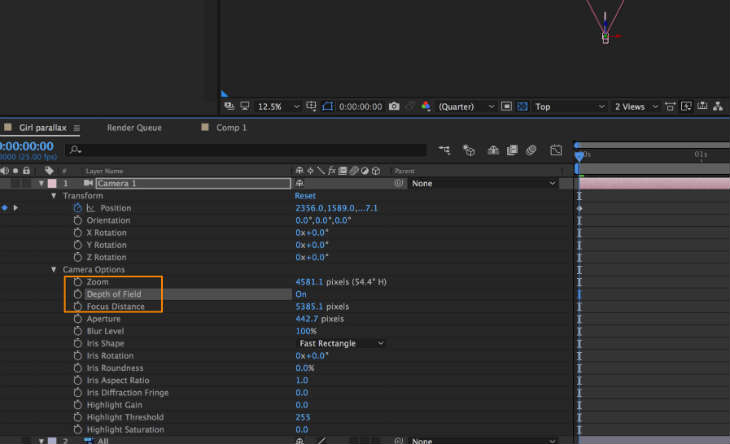
As we want the girl to be in focus, move the Focus Distance so that it lands on her layer (you will see it move in the left hand screen) and adjust the Aperture to see the rest of the layers blur according to how far they are from the camera. You can keyframe these to stay focussed on, for example the girl as the camera moves, or you could use this method to do a focus pull to another part of the image. It’s a great way to add realism as a real camera would have depth of field, and sometimes it’s the perfection of an animated scene that gives it away as CGI.
You could then go on to add effects to the image, for example her hair blowing a little in the wind, the water appearing to move in the distance, or even birds in the sky. You could even go as far as changing the sky to a different time of day and adjust the rest of the image to suit the tone.
A good trick to make it seem real, is to add lens flare, which is can be found in the Effects panel. I added this to my composition and keyed the flare centre and brightness. I also added a little bit of turbulent displace to my sea to add movement to the water, using a wiggle (1,35) expression rather than using key frames. This means during 1 second it will wiggle 35 pixels, so you can increase these amounts for more frantic movement. 
I also added movement to the hair by duplicating the girl layer and masking off a small section, moving the anchor point, and keying the Z rotation. I duplicated this multiple times and used a loopOut() expression on a few key frames, to make the hair move in various places, varying the movement slightly. 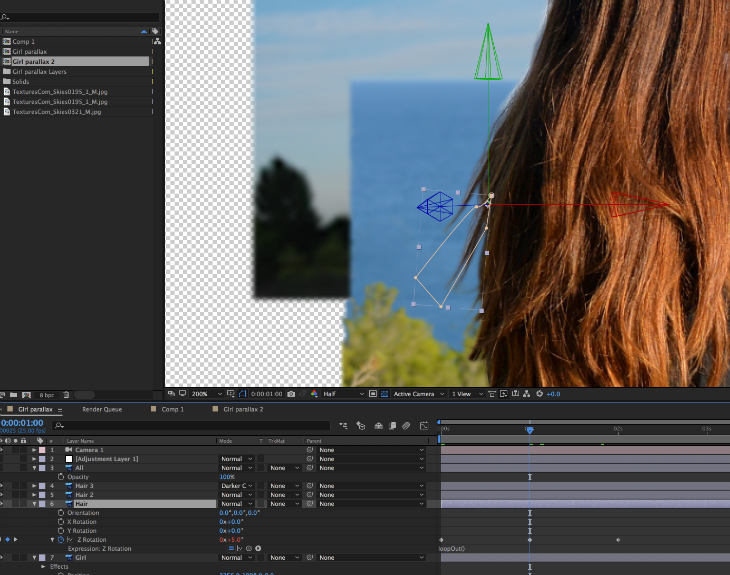
With more time, the hair would be a main focus of the piece as with the sky moving that fast in the background, it seems like the wind would catch the hair. You could also distort the clothes slightly. All of this is achievable with time.
Here is the final result:

Stay Updated with Our Latest Insights
Get expert HubSpot tips and integration strategies delivered to your inbox.


